Many businesses rely on serverless architectures and choose to process documents in the cloud.
We provide an integration with one of the most popular workflow automation services called Zapier.
The ConvertAPI app on Zapier is becoming highly popular, and many customers are extending their workflows using our service that offers broad file type conversion support.
It is super easy to set up and requires no development skills at all. However, there are some nuances that may be taken into consideration to take full advantage of our service. In this article, we will explain how to process multiple files returned by the ConvertAPI conversion.
Conversions that result in multiple files
Some conversion endpoints may return multiple files as a result of the conversion, and you may wonder how to process each file individually.
Some common examples that return a file array as a conversion result would be:
And so on. Zapier aggregates such results into a single field joined by a comma delimiter. But worry not! There is a solution for iterating through those files one by one. It involves a single step that is easy to set up and is completely free.
Process multiple files individually
If you try to perform any of the conversions listed above, in the "Test & Review" tab, you will see a file array as you would expect. For this demo, we will use a ZIP archive that contains 3 PDF files and perform a ZIP to EXTRACT conversion on Zapier. The extracted result looks like this:
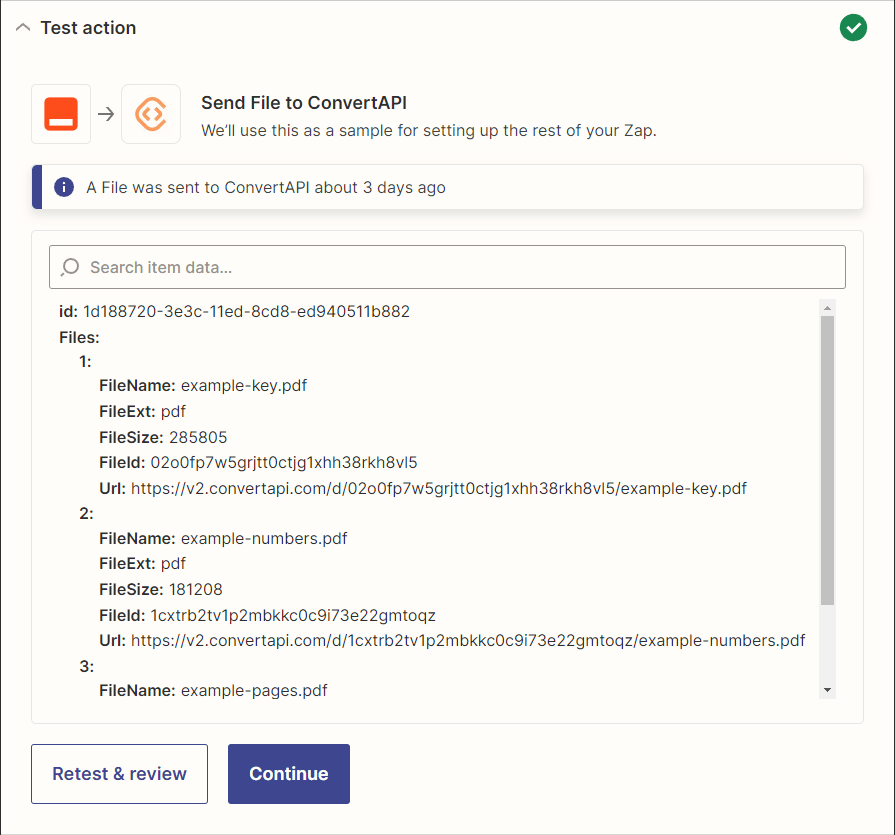
As you can see, the extracted files are separated into three sections, each with its own file metadata. However, when you try to pick them in the next step, you will see that the file IDs, URLs, etc., are aggregated into a single field separated by a comma:
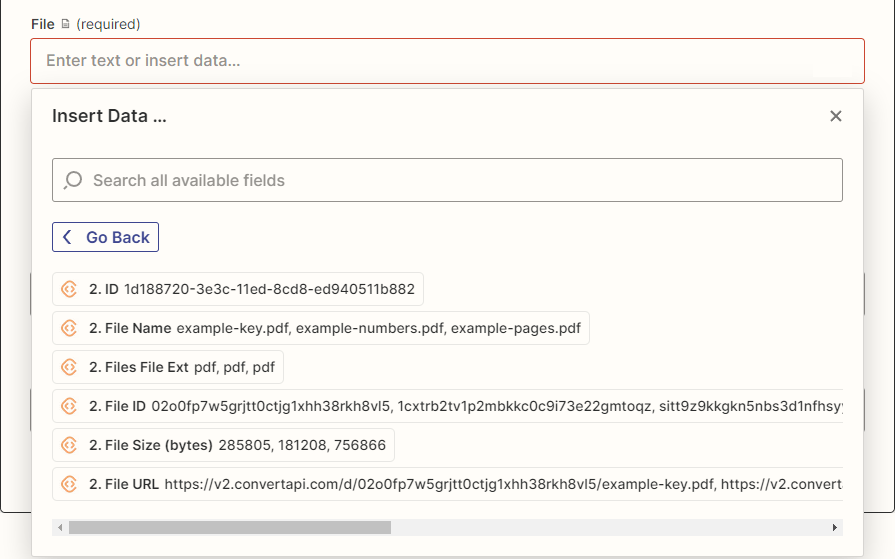
By picking the "FileUrl" field in the following step of your workflow, you are selecting all of these files from the conversion result in one go. But you might want to process each file individually, e.g., based on the file type.
For this case, we will extend our workflow with Zapier's native app called the "Looping".
The "Looping" app allows you to iterate these fields individually for further processing. This is a powerful approach as it allows you to create a Zapier workflow without knowing how many files you will need to process in advance. For example, a ZIP extraction conversion might result in 5, 6, or 9 files, and you will be able to iterate all of those items dynamically.
Without further ado, let's get started!
Iterate file URLs one by one
In this example, we will set up a workflow that iterates the results and returns file names and URLs, but you can apply the same technique to file IDs and other fields if need be.
Let's add the "Looping" app to our workflow.
In the "Choose app & event" screen's "Event" field, select the "Create Loop From Line Items" option.
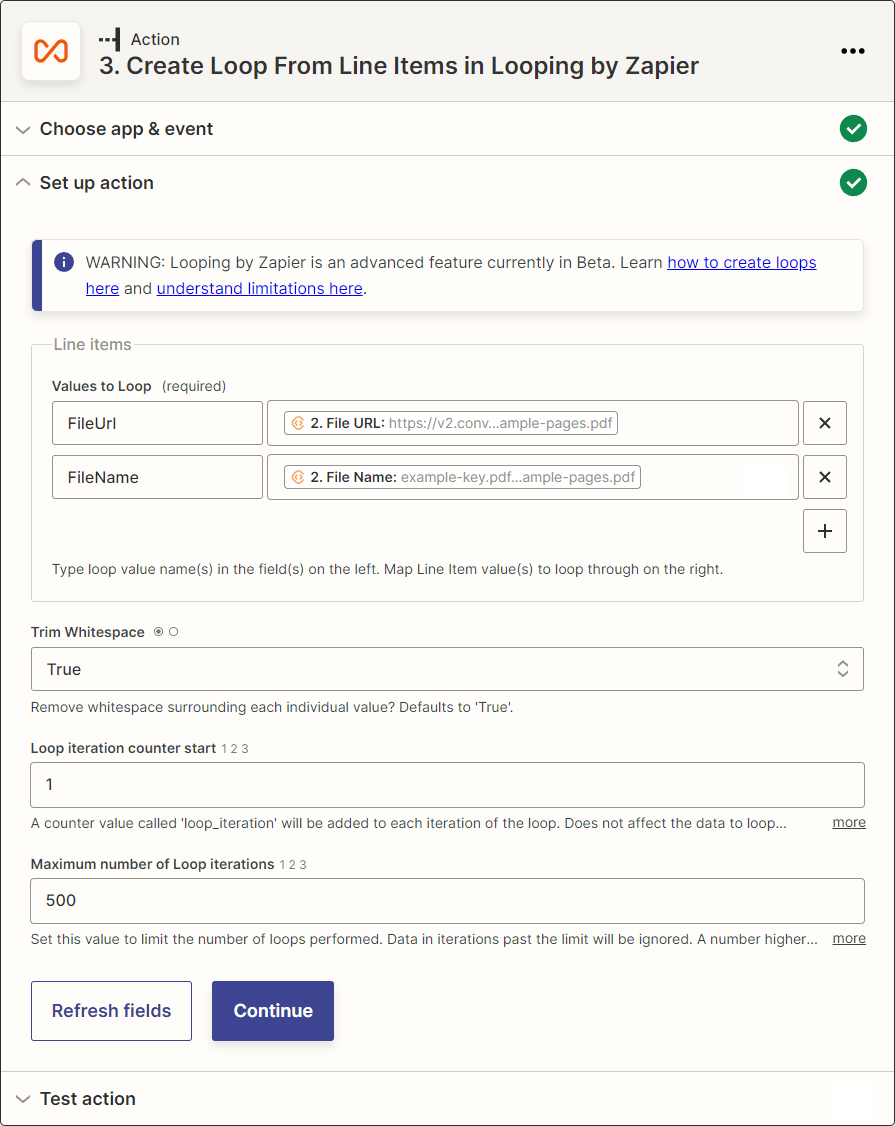
In the "Set up action" screen, we will map the FileUrl and FileName fields to the ConvertAPI results. In the "Values to Loop" editor, you can choose your own field names on the left-hand side for further reference. On the right, you will want to select the corresponding fields from ConvertAPI containing multiple values from the previous step.
Keep in mind that this editor allows multiple fields to be mapped. In our case, we'll just take the FileUrl and FileName from each iteration.
Our action setup will look like this:
Note: You can achieve the same with the "Create loop from text" option by splitting the aggregated FileUrl string by a comma "," separator.
After the test run, we can see the File URLs array results in three loop iterations, each containing an individual file URL:
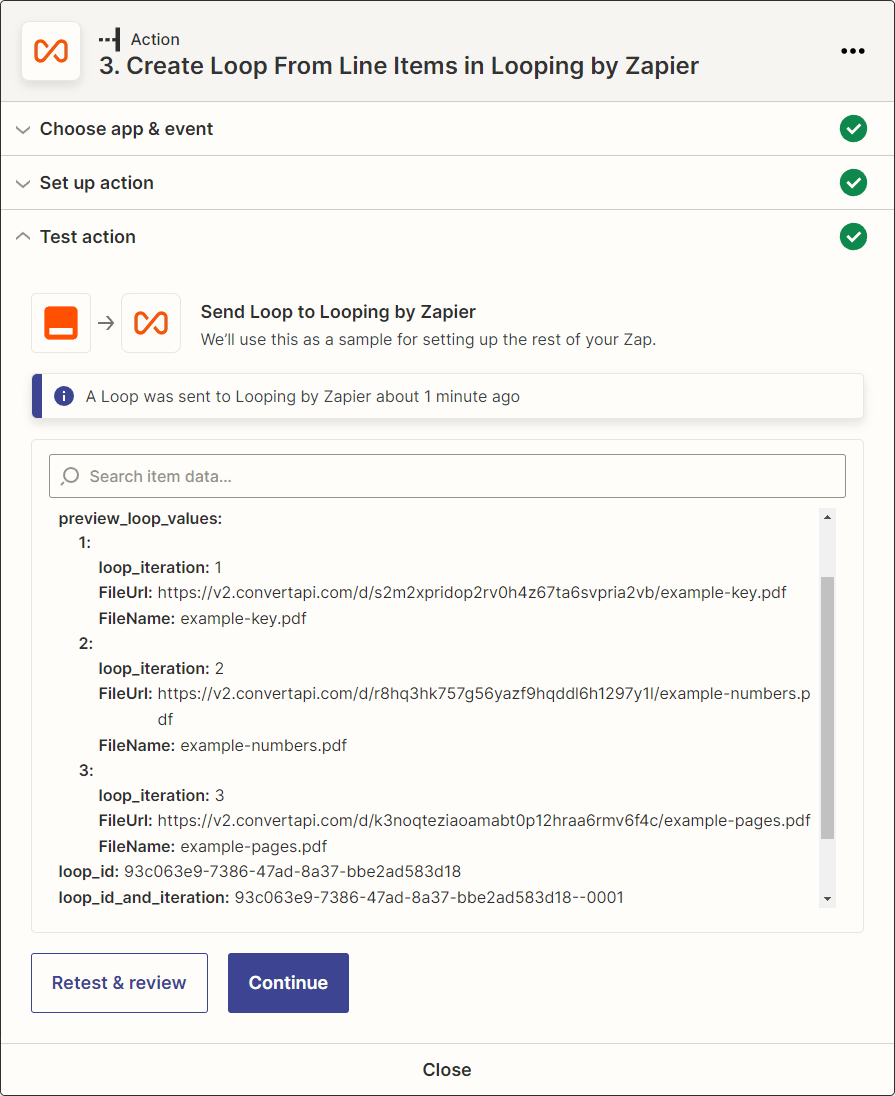
This step separates the aggregated file URLs and runs the following workflow steps as many times as there are iterations. Since we passed an archive that contains three files to the ConvertAPI ZIP extraction, we can see that so far, the results are correct.
Use individual files from the Looping iteration
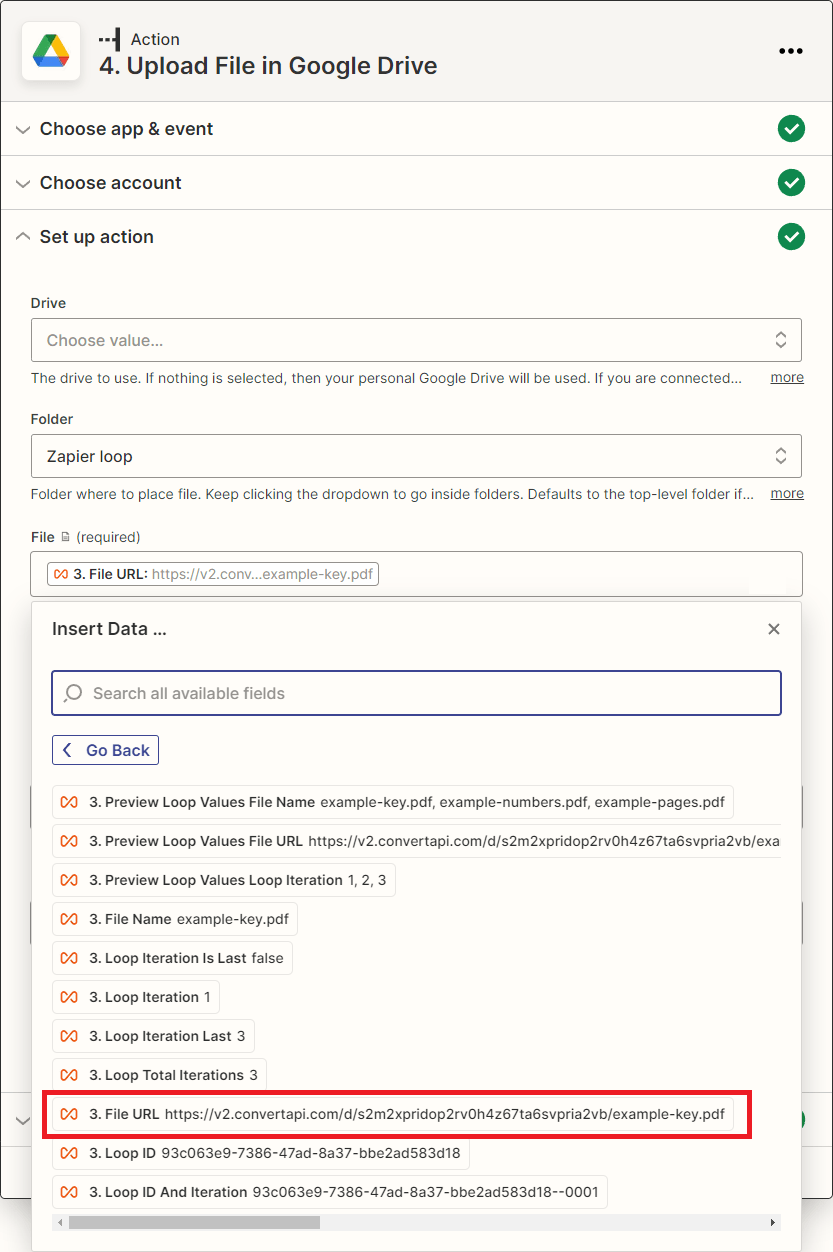
Once we have the individual files, let's see how to use them in the next action. For this case, we will use the "Upload file to Google Drive" action.
In the "File" field, we will select the "FileUrl" field from the Looping app's results. We can do the same with the "File name" field, respectively. The step's setup will look like this:
It looks like we're all set up and ready to publish!
Note: Keep in mind that the Looper won't actually loop over all values in the "Test & Review" mode. We need to publish our app to see the complete results.
Conclusion: Published workflow results
Once published, I uploaded the Zip archive containing 3 PDF files to a Google Drive folder specified in the Zap's first step. Not even a minute passed, and boom! We have all those files uploaded to Google Drive separately:
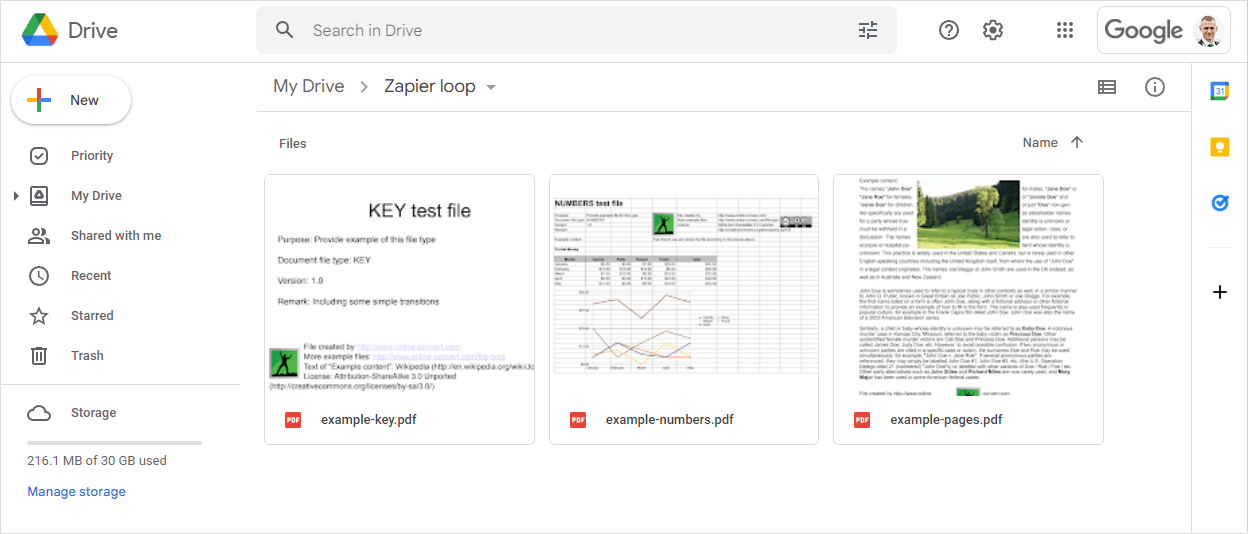
This confirms that our workflow works excellently! What may seem a tricky task to achieve is actually quite simple and very flexible. Thanks to Zapier's Looping app, we can extend our workflow's functionality to process multiple files individually.