Many companies, including our own, have hundreds of documents to review, edit, and archive every month. This includes invoices, specifications, design changes, contracts, and other red-tape stuff. These monotonous tasks repeated every month become the boring and time-consuming routine not only for our accountants but for us developers as well. And that’s where Zapier comes handy.
Using our ConvertAPI app on Zapier allows you to connect your document repositories from Google Drive or Dropbox to our file processing service and automate your daily tasks at ease. It allows you to:
- Convert your Google Drive or Dropbox documents to Word, Excel, PDF and other 500+ file conversions
- Encrypt, decrypt, compress, merge, split and watermark your documents on Zapier
- Combine multiple file conversions in a single Zapier workflow
- Process files of up to 2GB file size
- Automate document flows with this fast and secure Zapier document management app
- Convert websites to PDF or images like JPG and PNG
- Get quick support for any questions when setting up the Zap
With the ConvertAPI Zapier app, you can use all conversions you can find on https://www.convertapi.com/conversions and apply custom properties to suit your needs. With our document processing app, you get many file input options like the file itself, file URL, files hosted on Google Drive and Dropbox, website URL or even plain text data. You can attach event handlers to your Google Drive or Dropbox account for ConvertAPI to process your files automatically.
Real-life example
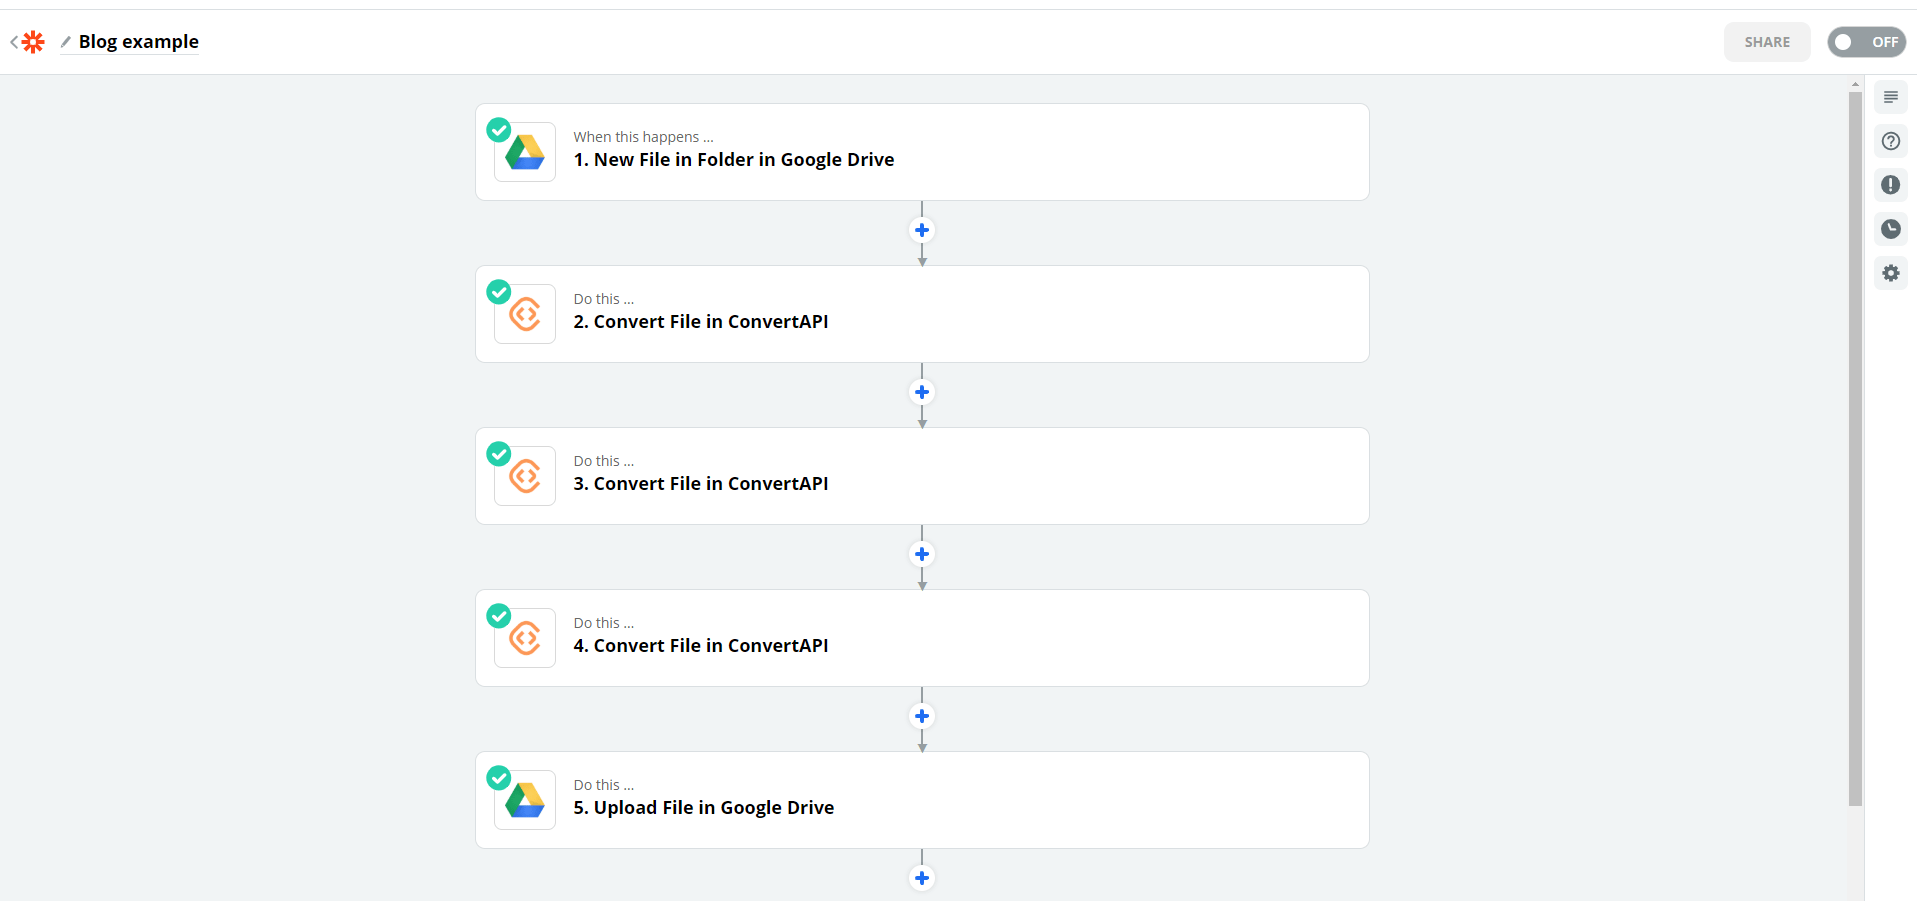
One of our use-cases where we managed to save time and reduce repetitive work is automating the management of paid invoices with Zapier. We receive many invoices every month for our servers, tools, and services that we use every day. In this example, we will show you how we automated our invoice management task by converting the files based on a pre-set custom Zapier flow and save the processed data back to our Google Drive account. We can achieve that in 5 simple steps. So the business logic for our demonstration is as follows:
- Create a folder called "Invoices" on Google Drive and connect it to Zapier
- Convert Word and Excel documents from "Invoices" folder to PDF
- Apply "PAID" Watermark on PDFs
- Archive PDFs using PDF/A file format
- Save files back to Google Drive to a folder called "Archived Invoices."
Step 1 - Set up Google Drive
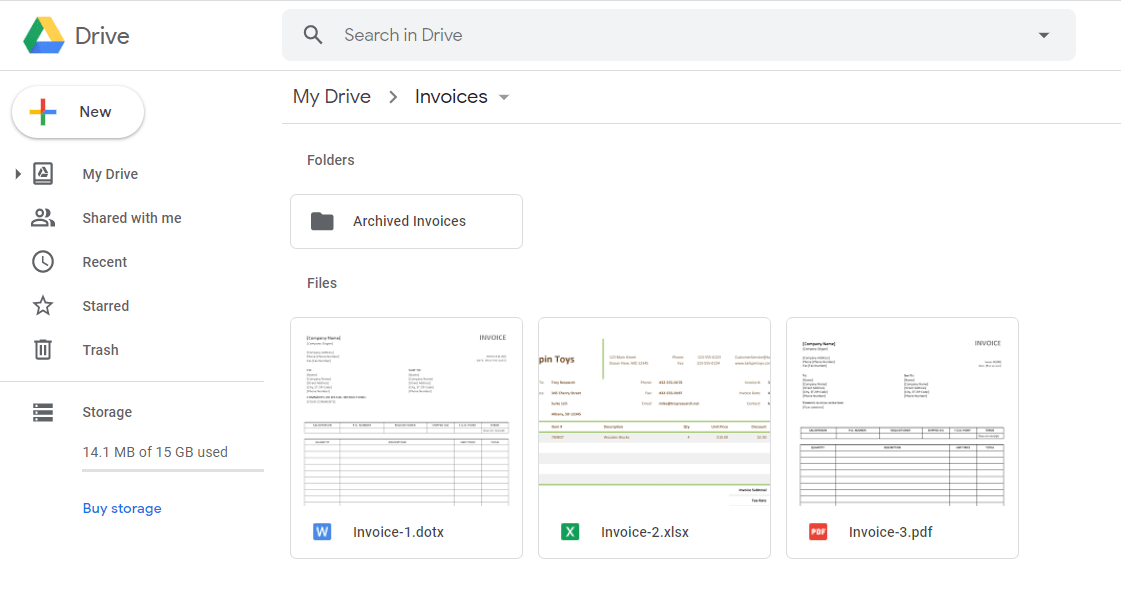
First, let's create a folder for this Zap in Google Drive named "Invoices." In order to do that, go to Google Drive, Right-click -> New Folder, and call it Invoices. Following the same actions, let's create a folder called "Archived invoices". Now let's add some .xls and .docx documents to our "Invoices" folder. Once finished, you should have a file structure similar to this:
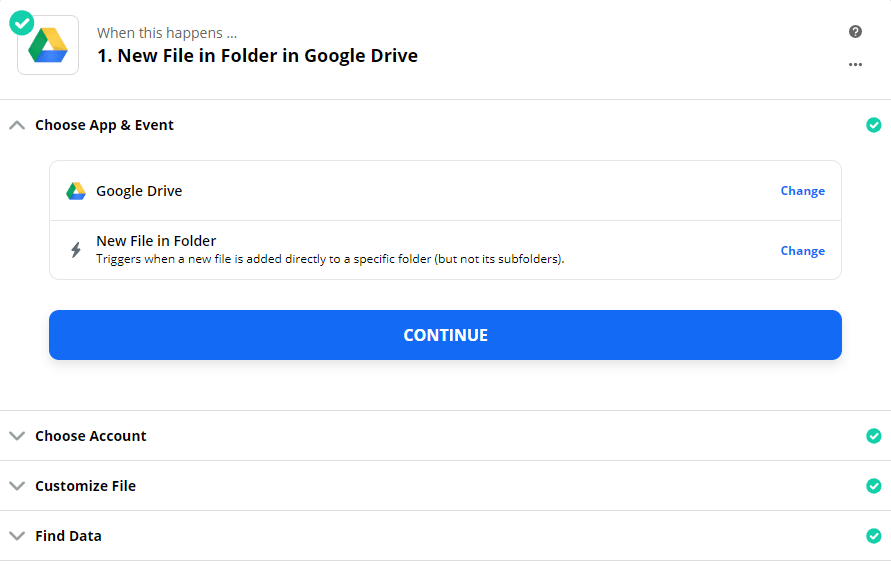
Now let’s move to Zapier. We will get back to Google Drive at the very end of this demo. On Zapier, let’s create a new Zap and select Google Drive -> New File in Folder as our first item of the flow.
Then connect Zapier to your Google Drive account, and select the “Invoices” folder:
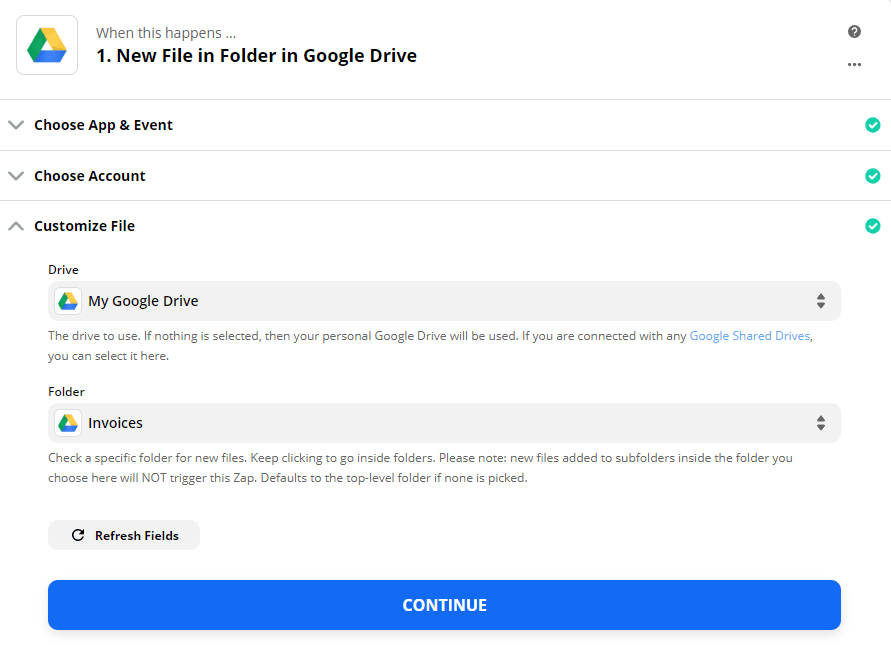
If your trigger test completed successfully, we’re ready to move to ConvertAPI.
Step 2 - Determine and convert any file type to PDF
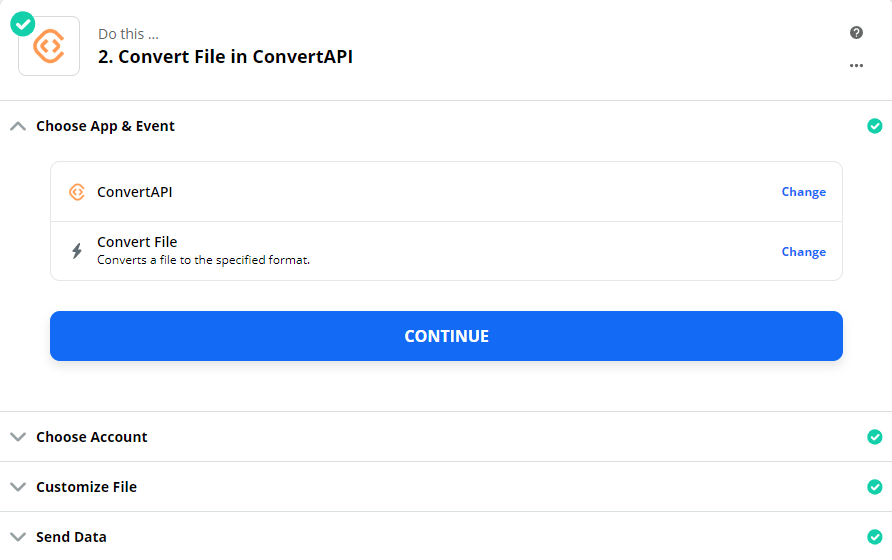
As the second workflow item let’s select ConvertAPI app and “Convert file” event:
On the “Choose Account” screen you’ll be prompted to enter your ConvertAPI API token. If you don’t have it yet, just visit https://www.convertapi.com/ and sign up for free. You’ll find your API Token in the account overview page:
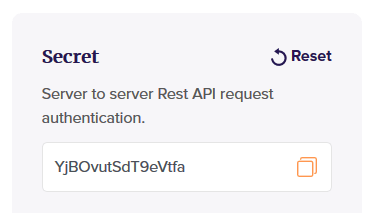
Simply copy-paste this key and your Zap is connected to your ConvertAPI account. Now you can use all features of this app, like convert Word, Excel, PowerPoint to PDF, or even images like JPEG or PNG. With this Zapier app, you can also encrypt/decrypt your documents, reduce their size by compressing, archive them into a single zip file, and much more. As mentioned above, we will only convert all files to PDF, add custom watermark text, and save it back to Google Drive archived into PDF/A format. Now let’s set up our ConvertAPI Zapier app.
In the “Customize File” section’s “File” field click [Show all options] and find “File (Exists but not shown)” option. This will be our file source for document processing. Let’s leave the “Convert From” empty for ConvertAPI to determine the file format automatically. In the “Convert To” field we’ll select PDF option. So our first ConvertAPI step looks like this:
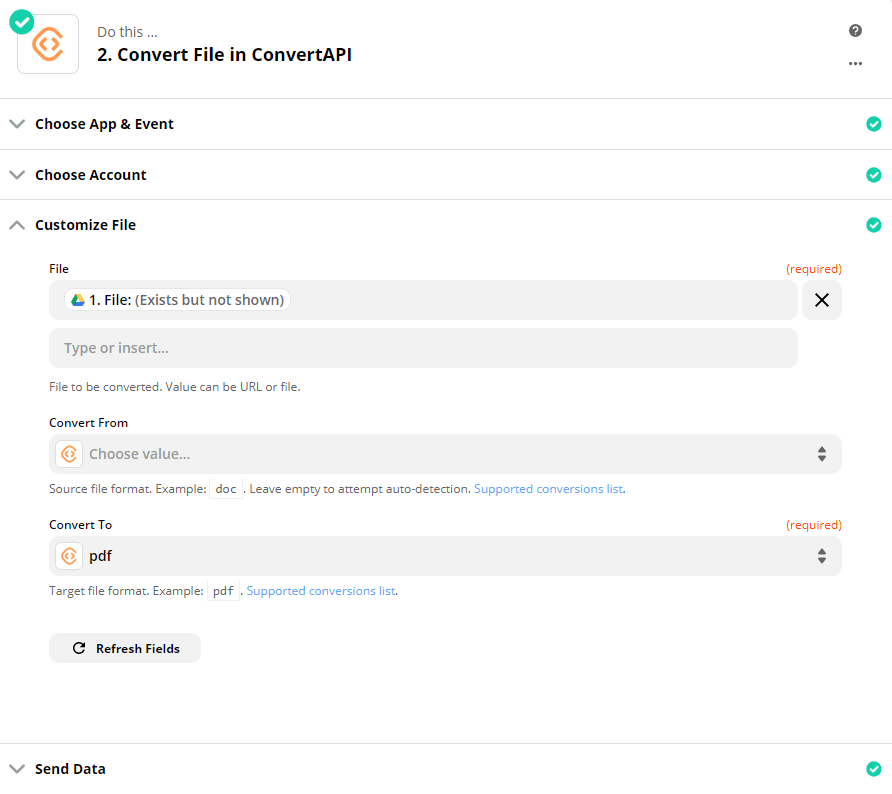
That’s it! Our second step of flow is completed. If your test passes successfully, let’s move on to the next step.
Step 3 - Apply a watermark to PDF
Again, let’s add the ConvertAPI app, select “Convert a file”, and connect to your ConvertAPI account as we did on the previous step. Now in this “Customize File” section’s “File” field we’ll select “Convert File in ConvertAPI” -> “Show all options” -> “File URL” for the ConvertAPI app to take a converted file for further processing. In the “Convert From” and “Convert To” fields we’ll select PDF to Watermark, and in the “Watermark” field let’s type the word “PAID”. To make it a bit funky let’s apply some advanced properties to style our watermark text. Let’s set “Show advanced options” to “True” and in the expanded fields section let’s set “FontSize” to “150”, “Stroke Color” to "#FF0000", “TextRenderingMode” to “Stroke text without fill” and “Rotate” value to “45”. So our “Customize file” settings look like this:
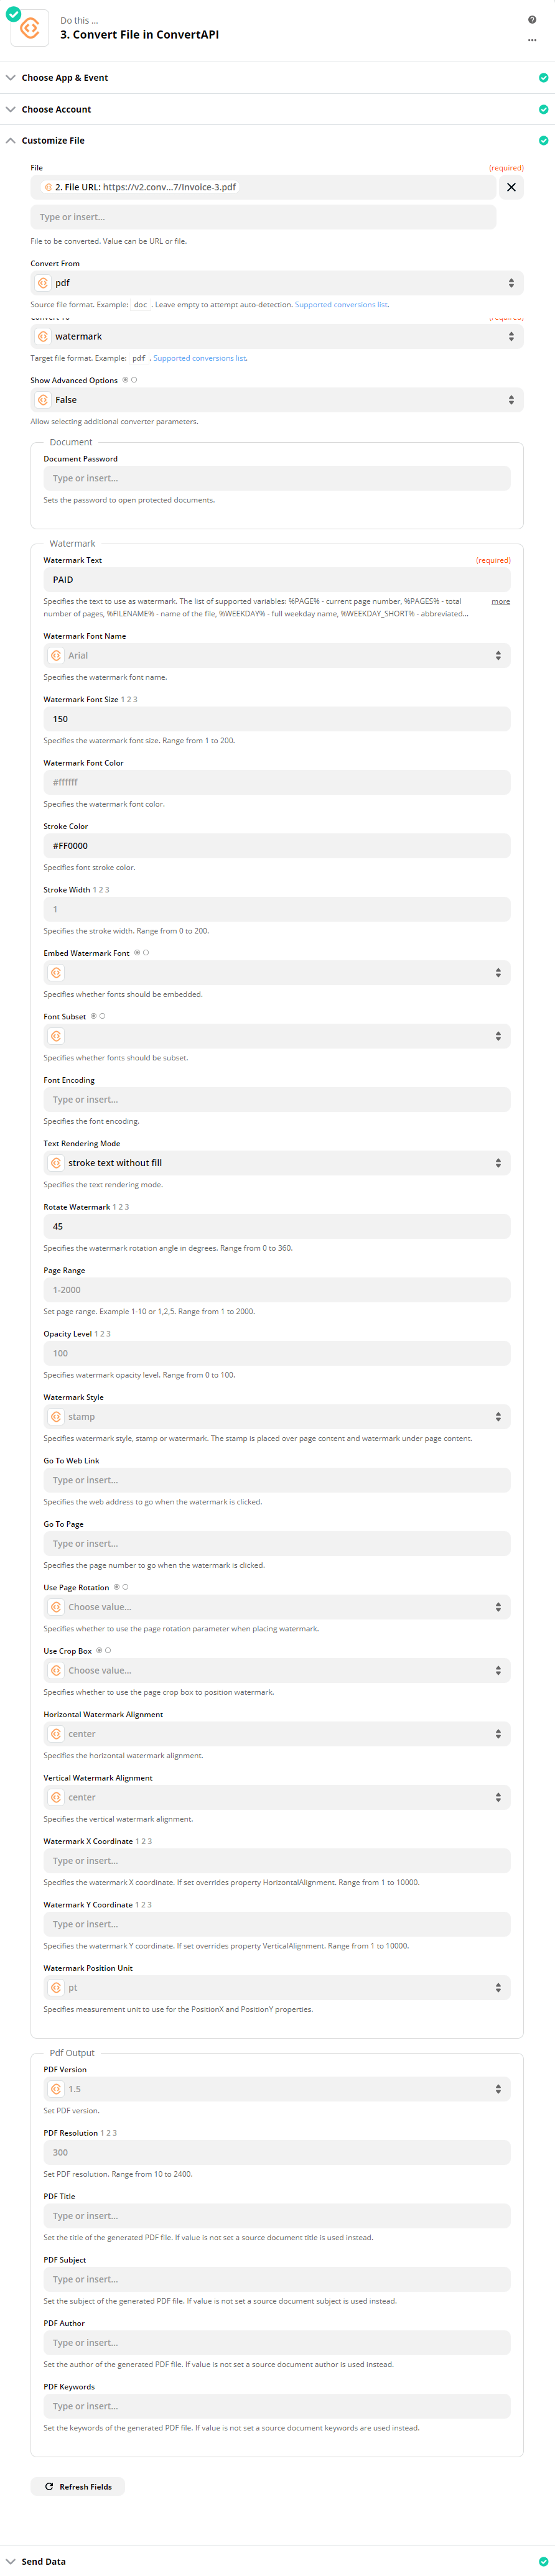
Congrats, we’re almost there!
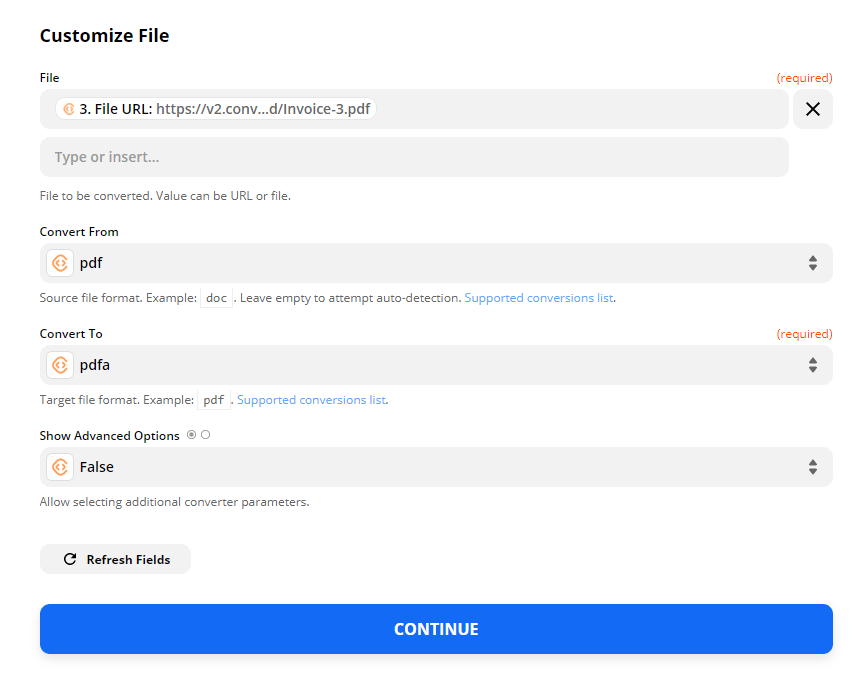
Step 4 - Archive PDF to PDF/A
Now for the last conversion, we’ll archive our PDFs to PDF/A. Again, let’s add the ConvertAPI app, select “Convert File” and connect to your account as we did on a previous step. In the “Customize File” section’s “Field” input expand the last option “3. Convert File in ConvertAPI”, click [Show all] and select the “File URL” option. In the “Convert From” - “Convert To” fields we’ll select PDF to PDFA. So the last ConvertAPI setup looks like this:
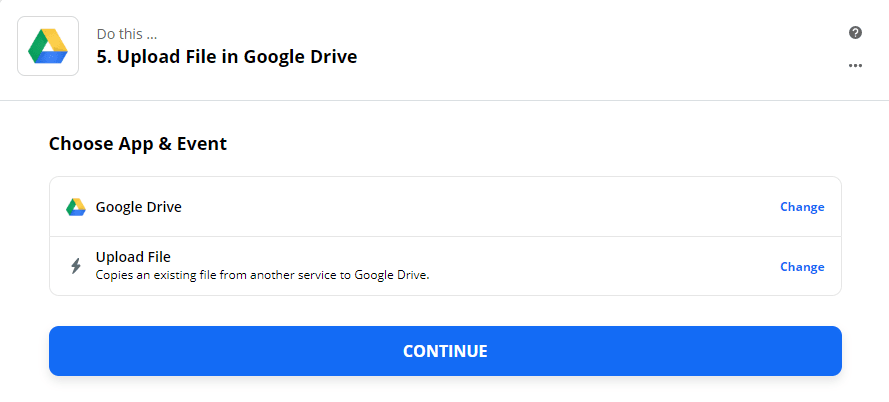
Step 5 - Save the processed result on Google Drive
Finally, let’s save the converted results into our “Archived invoices” folder on Google Drive. In order to do that, let’s add the final Google Drive app to our Zap conversion workflow. The event in our case will be “Upload File”.
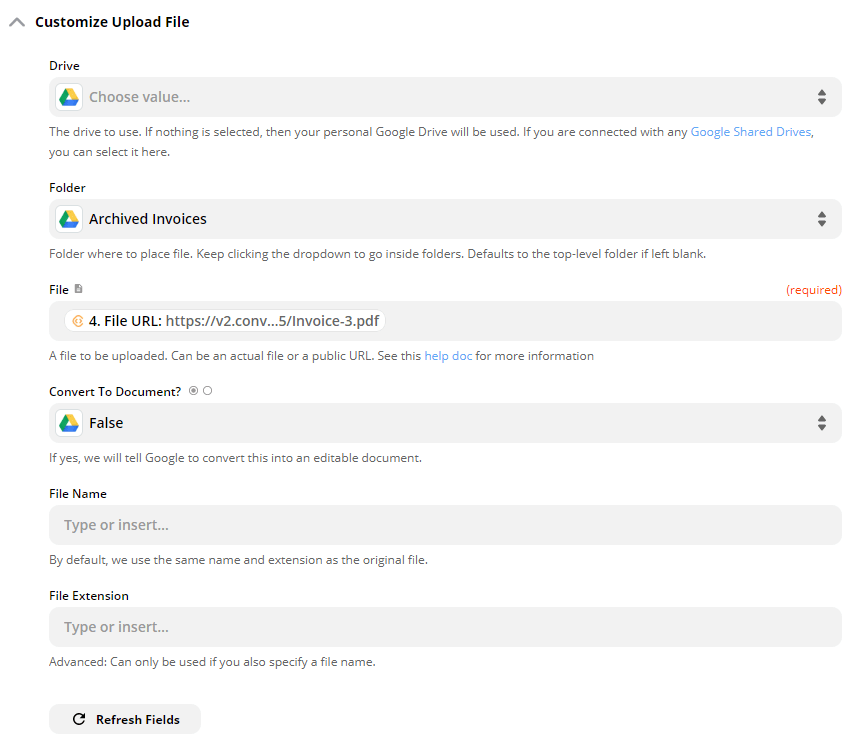
Once connected to your account, select “My Drive” and “Archived invoices” in the “Drive” and “Folder” fields. In the “File” field let’s select “4. Convert file in ConvertAPI” -> “Show all” -> “File URL”.
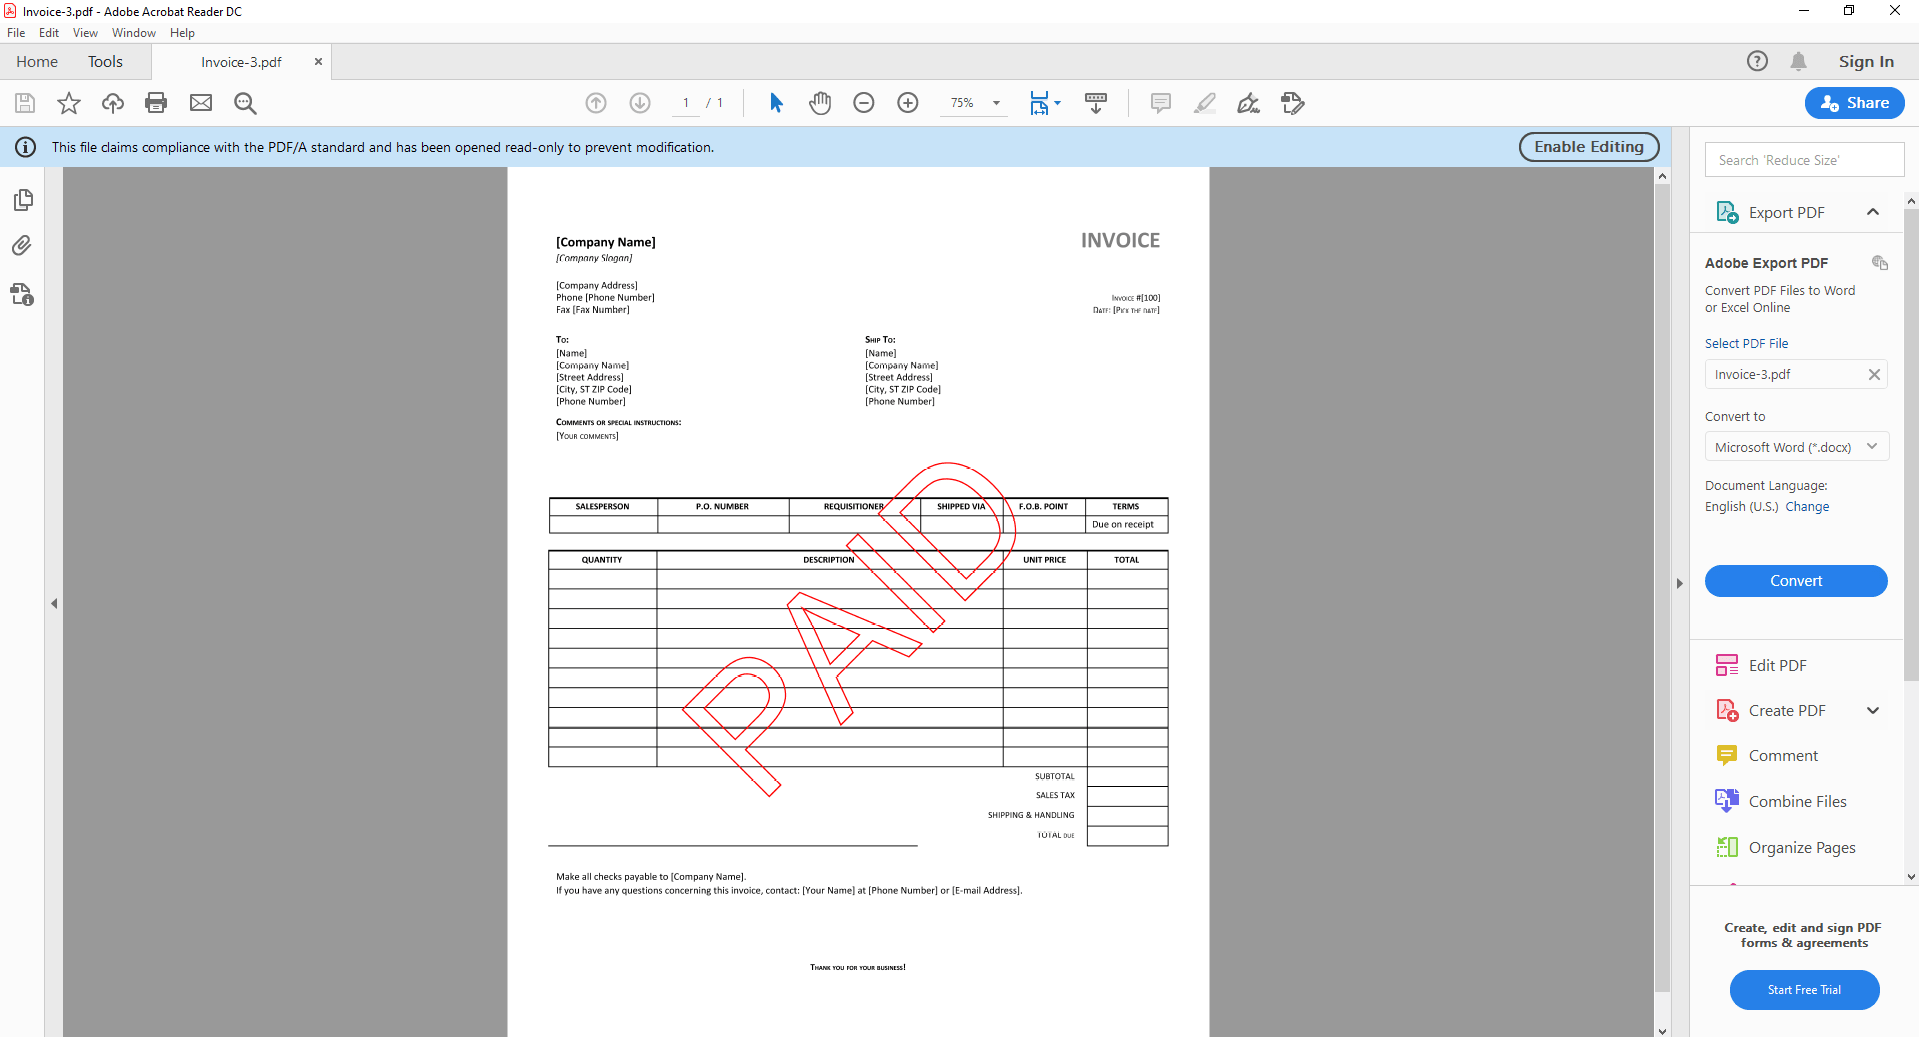
And voila! Our test successfully creates a converted invoice with a “PAID” watermark in the “Archived invoices” folder. From now on, you simply need to upload your paid invoices to your Google Drive “Invoices” folder, and Zapier will do the rest. Our watermarked PDF/A file looks like this:
Save your time with the ConvertAPI Zapier app
To sum up, you can benefit hugely from automating routine document tasks with Zapier. With our ConvertAPI Zapier app you can achieve much more than shown in this example. Feel free to use any of our pre-set Zap templates. Find more actions available for document management in our docs. Feel free to contact our friendly customer support if you have any questions!